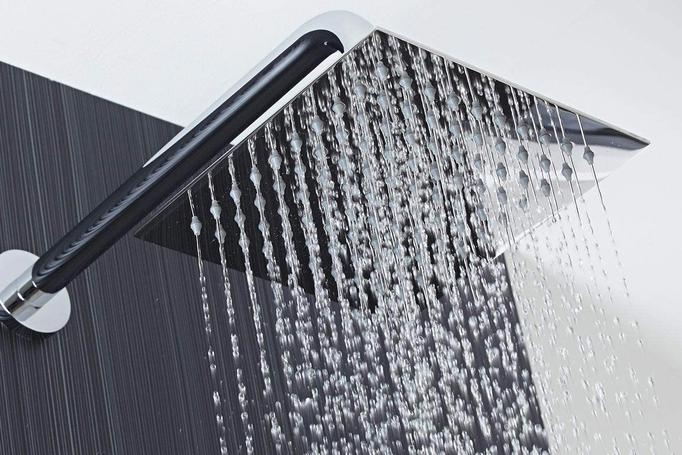
I know first-hand because I recently installed one myself and it’s one of the best changes I’ve ever made to my apartment. Let me take you through how I did it so that you, too, can enjoy this boon. Here's what you'll need:
Choosing the right rainfall shower head is vital. You want to make sure that it’s big enough to give you the feeling of a true rainfall shower head while also not requiring all sorts of crazy high water pressure that many homes don’t have.
One way to get around that as best as possible is to opt for a high-pressure shower head, like this 8” option from COSYLAND. With its large surface area and included hand shower, this shower head will turn your morning routine into a true spa experience.
COSYLAND 8'' High Pressure Rainfall Shower Head Handheld ComboCOSYLANDamazon.com$59.98Shop NowAny sort of DIY project in the house might seem daunting at first or you might think you need all sorts of tools to get anything done. But actually, installing a shower head is one of the easiest projects you can do around the house. You only need one tool: an adjustable wrench.
Many shower heads will come with a wrench of their own, but I’ve found that using your own works better — plus, it’ll help you get rid of your existing shower head, and come in useful down the line with other DIY projects you decide to engage in (trust me, they’re addictive). This 6-inch adjustable wrench from Craftsman is ergonomically designed and will help you get the heads swapped out in no time.
CRAFTSMAN Adjustable Wrench, 6-InchCraftsmanamazon.com$9.98Shop NowThe most important thing to do to prevent your new shower head from leaking is to seal the threads. Metal on metal may seem like a pretty sturdy barrier, but over time leaks will form unless you put something a little more flexible in there.

That’s why you’ll want to add some Teflon tape to the threads. With how affordable this stuff is (you can get four rolls of it for just $6 bucks) there’s no reason to skimp out on it. The tape creates a watertight seal within the threads to stop leaks now and in the future.
4 Rolls 1/2 Inch(W) X 520 Inches(L) Teflon TapeVOTMELLamazon.com$5.99Shop NowTechnically, you don’t really need these items to install your rainfall shower head. But while you have the old shower head off, it’s a good idea to scrub the pipe and make sure you’re starting with a clean surface.
Chances are high that the threads on the shower piping will have old Teflon tape on them and a buildup of calcium and lime from years of use. A few quick sprays of Lime-A-Way bathroom cleaner and a couple passes with an electric scrub brush like this one from Rubbermaid and you’ll be good to go. This will make for a smoother installation overall, and further prevent those dastardly leaks.
22 Oz Lime-A-way Lime Remover Trigger Spray 16oz - 2 packLime-A-Wayamazon.com$17.38Shop NowRubbermaid Reveal Power Scrubber Multi-Purpose Scrub BrushRubbermaidamazon.com$18.86Shop NowNow that you have everything you need to change your showering life, it’s time to get started. Here is all that you need to do to install your new rainfall shower head.
More ShoppingMany people are afraid to purchase a rainfall shower head because they don’t think they have enough water pressure to produce all that water. But the interesting thing is, that modern rainfall shower heads don’t actually use any more water than most standard shower heads.
The way that they’re designed, with the very flat shape, the water is just spread across a greater surface area and expelled at a higher pressure. Most shower heads require between two to three gallons per minute of flow, and rainfall shower heads are no different.
Taking off the old shower head is incredibly simple and shouldn’t take more than a minute or so. Using your adjustable wrench, carefully reach up to the nut between the shower head and the piping that goes into the wall. Tighten your wrench onto it and turn it counter-clockwise.
Once you break the nut loose, you should be able to just simply twist the shower head off the rest of the way by hand. Once removed, make sure you check the piping and pull out the old screen filter if it’s still there.
Then, using your bathroom cleaner and scrub brush, get all that old gunk off the threads of the shower piping. A clean surface will make the installation of the new head easier and also prevent leaks in the future.
Follow the installation instructions that come with your shower head to make sure you have the filter screen and pressure reducer in the right place within the shower head. Wrap a few layers of your Teflon tape around the pipe’s threads to make a tight seal. Then simply twist the new shower head onto the shower piping in a clockwise rotation.
The threads used for bathroom fixtures in the U.S. are standard, so any shower head that you buy should screw right onto the existing piping with no problem (unless your home is very old). Twist the new head on hand-tight and then give it a quarter turn with the wrench and that’s it.
Enjoy! If you’re anything like me, you’ll want to jump right in the shower after installing your new shower head. And let me tell you, that first shower with a rainfall shower head is life-changing. You’ll never go back.